Keeblers get a Win @ Temple

Darling of the community Berger went up to Temple this past weekend (8/9) and won an event. He even wrote about it. Now onto that writing.

The lists:

Kaelyssa, Night’s Whisper – Shadows of Retribution Tier 4
Kaelyssa
Hydra
Manticore
Chimera
2x Mage Hunter Assassin
Eiryss, Mage Hunter of Ios
Narn
2x Ghost Sniper
2x Arcanist
2x Max Mage Hunter Strike Force with Strike Force Commander
Garryth, Blade of Retribution – Assassins Tier 4
Garryth
Aspis
Gorgon
5x Mage Hunter Assassins
Nayl
2x Min. Mage Hunter Strike Force with 1 Soulless Escort
Max Mage Hunter Strike Force with Strike Force Commander and 3 Soulless Escorts
Max Mage Hunter Infiltrators with Eiryss 3
Round 1 – Kaelyssa vs Lucant – Incoming
Round 1 I get a Convergence of Cyriss player named Kiernan playing Lucant and Axis.  I was pretty sure I was going to get Lucant so I dropped Kaelyssa.  With the 2 Units of Strike force I assumed I could jam out the zones.  I was wrong.  We both position and jockey.  I go on an assassination run bring Lucant to 10hp clear my zone and score 1cp.  He repairs Lucant (now named LouCunt) to mostly full, his Assimilator comes in and kills my Manticore stopping the score.  He runs a diffuser into some Strike Force.  Next turn my Hydra kills the Assimilator opening my half of the table.  I run arcanists into his zone and go to 2 Control Points.  His next turn he clears his zone, runs Lucant in, can’t stop my zone he dominates for 1, I dominate for 1 bringing the score to 3-1.  At the start of my turn Narn and Mage Hunter Assassin drop his Objective giving my my fourth Control Point and I dominate my zone to make it 5-2.
Round 2 – Garryth vs Grissel2 – Close Quarters
Round 2 I get paired against Derek Anderson playing Trollbloods.  He has Grissel2 and Runes of War.  I assume Runes isn’t an option due to the amount of spell hate my lists have.  I drop Garryth due to Grievous Wounds and 5 MHA vs. his Warders.  Derek drops Grissel.  I win the roll to go first, Garryth charges up the table and everyone Runs.  Advanced Deployed Garryth in the killbox is super scary.  Derek runs up and feats with Grissel.  Garryth Death Sentences the Long Riders and moves back towards my Flag and shoots a Long Rider triggering Hyper Aggressive (whoops).  Mage Hunter Infiltrators go in and with some crazy dice kill 3 Long Riders and then forget to reform (I’m bad and should feel bad).  One of the non AD units of Strike Force Shoot the Fell Caller pulling him into charge range of an Assassin (brilliant).  Assassin drops the Fell Caller.  The other Assassins tickle the Warders and try to kill a few, while the advance deployed Strike Force try to gun down the krielstone and the second non-AD unit jams the warders up near Dereks flag.  I run Nayl to within 8″ of Grissel and pass turn.  Derek brings his Storm Troll to kill Nayl miss-reading the card.  Nayl dies and Grissel, Krielstone, and Storm Troll lose all their Fury, Animi, and Spells.  Derek catches some crap dice when trying to retaliate and runs Horthol over to my Flag to stop me from scoring.  My turn I kill Horthol with Garryth while basing my flag.  Used his 2 Melee attacks and forgot Horthol was a Dragoon so Had to gallows kill or I used an Assassin I don’t remember.  MHI push into the Kriel stone after the  Strike Force with Commander keep shooting it.  Mage Hunter Assassins start whiffing on Warders and I get a bit nervous but go up to 1 Control Point.  Derek pieces together an assassination run of Garryth he needs to free up his last Long Rider from the Infiltrators.  Unfortunately one Infiltrator ate his Wheaties that morning and stop the charge.  The Long Rider runs to my flag, Derek tries to Block LOS to Grissel with some Warders.  My turn starts, One unit of Strike Force escorting GarrythCMA the Long Rider and come up short.  The Assassin back their gets in and kills the Long Rider off.  The Strike Force with Commander kill the 2 last Krielstone members after they tough two Ghost Sniper shots.  Apsis beat backs a warder to try and clear the last two Mage Hunter Infiltrators and Eiryss3.  Garryth moves off the flag and shoots Grissel twice doing 11ish damage to her Derek has 1 fury chooses not to transfer.  MHI and Eiryss3 charge Grissel, 1 Infiltrator makes it, another dies to a free strike and Eiryss3 doesn’t get hit my the free strike.  Eiryss connects, drops the fury and puts Grissel in the dirt.  Tough check made.  Eiryss takes her second swing, another Tough check make.  MHI puts grissel down again, and another Tough Check.  I start sweating nuts at this point as this is all I have left.  MHI secondary kills Grissel, no Tough check made.  Well fought game vs. Derek took a long time but was super fun.
Round 3 – Kaelyssa va eHaley – Destruction
Round 3 final round, I get paired against the one, the only, Trevvie the Great.  Destruction is the scenario he has eHaley and Caine2 with Stormwall.  I pick Kaelyssa on the off chance he drops Stormwall to try and covering fire the zone.  He picks eHaley (ughhhhh).  He wins the roll first I pick the side with the wall since it helps me verses his Gun Mages.  He runs Thorn up gets some Time bombs off, kills two Strike Force dudes and debuffs another.  Everything thing else runs forward.  I run my Chimera, put backlash on Thorn and start lighting him up.  I also pop feat.  It only takes six Strike Force to drop Thorn (damn my dice) and obviously I don’t kill Haley.  I shoot up as much as I can and try to spread out to avoid the inevitable feat.  I put down covering fire between and obstacle and Trevvie’s objective forcing him around to the flank and out of the zone.  Trevvie feats back, kills a ton of stuff, leaves maybe seven total Strike Force alive from both units combined and engages my Chimera.  He also heals Haley for two.  On my turn we do the feat, Chimera throws a Forgeguard intoGorman fails to kill Gorman.  Mage Hunter Strike Force kill a couple forgeguard, one lone Strike Force guy try’s to hit natty 10s to get Haley and fails.  One Ghost Sniper kills a Forgeguard and the other was out of feat.  My two Assassins are also out of feat and Narn shoots a Stomguard to clear a charge lane.  One Assassin blows up Trevvie’s objective, the other charges Alexia1, and kills the risen and brings her to 1 HP.  The last Ghost Sniper moves up takes a shot, rolls a natty 8 and kills Alexia.  The Manticore puts covering fire in front of my Objective.  I score 1 Control Point and pass turn.  Trevvie brings Ragman to Dark shroud, Forgeguard wreck my Chimera, one Forgeguard gets the to Objective and two others die to covering fire.  He does seven damage to my objective and kills the Assassins and Narn.  Trevvie’s Eiryss2 comes up and disrupts my Hydra, and he passes turn.  Haley is hiding behind an Obstruction so remember that lone Mage Hunter Strike Force guy, ya, well he aims and hits Haley for two points of damage.  The other unit of Mage Hunter Strike force move around and aim and go in on Haley doing another three points of damage bringing her down to six hp.  Kaelyssa has a full stack comes up boosts to hit Haley and I forget to Phantom Hunter myself so I miss.  I cast phantom hunter, buy/boost and hit stealing a focus.  I boost damage dice off seven and I roll the 13 to kill Haley for the win.
Two caster kills and a scenario win, Two Kill Box scenarios against very good opponents when I had very assassination oriented lists was fortunate.  My opponents were great and Temple Games is always a good time.

DOGC Repeats as New England Team Tournament Champions!!!

For the second time in as many years, DOGC is NETT Champions! This year’s team was again captained by Anthony Ferraiolo, with Alex Buganski as 1st Lieutenant and Steve Sharnick as 2nd Lieutenant. Anthony switched to Cryx earlier this year, while Steve and Alex were both running Cygnar. The competition this year would be even more difficult than a year ago; not only does the event keep expanding to its’ largest size ever, it also was not part of Captain Con the best new convention in the North East, that garnered over 250 unique attendees playing Warmachine! Here is the lists and battle reports in the players own words…


Lists


Captain – Anthony Ferraiolo – Cryx


“I was comfortable in my lists, and had been playing them since Cause for Paws last month; I was thinking (in general) Denny vs Warmachine and G3 vs Hordes; creating enough matchup problems that my opponents could use their Team Feat and I would still be solid even in uphill battles.”


eDenny

Nightmare

Deathripper x2

Bane Calv (full)

Soul Hunters (full)

Satyxis Raiders (full) w/ UA

Blood Witches (full) w/ UA


eShade3

Harrower

Deathripper

Blackbanes (full)

Mech Thrall (min) w/ UA

Necrosurgeon

Soul Hunters (full)

Darrage Wrathe

Aiakos

Leviathan

Wraith Machine


~~~~~~~~~~

1st Lieutenant – Alex Buganski – Cygnar


“I was in the 2nd spot, the 1st Lt, and I went 3-2. Which while worse than last year I am still proud about my showing since I had five great games against five great players and the two games I lost were close. I was playing Cygnar and here are my two lists:”


ECaine

-Ol’Rowdy

-Squire

Lt. Allison Jakes

-Hunter

Reinholdt

Gorman

Eiryss2

Stormsmith

Boomhowlers

Aiyanna and Holt

Arcane Tempest Gun Mages w/ UA

Black 13th


EHaley

-Stormclad (bonded)

-Thorn

-Squire

Jr

Eiryss1

Anastasia

Nyss Hunters

Arcane Tempest Gun Mages w/ UA

Sliver Line StormGuard


~~~~~~~~~

2nd Lieutenant – Steve “Red Steve” Sharnick


Steve was also playing Cygnar, he did not decide on his two lists until very near the start of the event! Here is what he finally decided to play:


Caine2

Captain Allister Caine – WJ: +5

– Squire

– Ol’ Rowdy – PC: 9


Reinholdt, Gobber Speculator – PC: 1

Journeyman Warcaster – PC: 3

Alexia, Mistress of the Witchfire – PC: 4

Thrall Warrior – PC: 0

Viktor Pendrake – PC: 2

Rhupert Carvolo, Piper of Ord – PC: 2

Gorman di Wulfe, Rogue Alchemist – PC: 2

Eiryss, Angel of Retribution – PC: 3


Rangers – Leader & Grunts: 5

Arcane Tempest Gun Mage Pistoleers – Leader & 5 Grunts: 6

– Arcane Tempest Gun Mage Officer – Officer 2

Greygore Boomhowler & Co. – Boomhowler and 9 Grunts: 9

Horgenhold Forge Guard – Leader & 5 Grunts: 5


Kraye

Captain Jeremiah Kraye – WJ: +6

– Squire

– Minuteman – PC: 5

– Minuteman – PC: 5

– Stormwall – PC: 19

– Lightning Pod


Stormsmith Stormcaller – PC: 1

Stormsmith Stormcaller – PC: 1

Stormsmith Stormcaller – PC: 1

Journeyman Warcaster – PC: 3

Captain Arlan Strangewayes – PC: 2


Rangers – Leader & Grunts: 5

Lady Aiyana & Master Holt – Lady Aiyanna & Master Holt: 4

Arcane Tempest Gun Mage Pistoleers – Leader & 5 Grunts: 6

– Arcane Tempest Gun Mage Officer – Officer 2

~~~~~~~~~~


Round 1:  vs The Corpse Tokens

Scenario: Close quarters

Summaries:


Captain: vs Circle

“My opponent had pKrueger in his list pair, and I don’t recall his other Warlock, but I had no doubts on who I was getting dropped against me; I decided to go with Goreshade. He is who I prefer against Hordes most of the time anyway. The game plan was to get pressure on Krueger quickly, and get the Feat out as soon as possible so I didn’t have to worry about it late. Mostly the plan worked, and I was able to get up into his grill quickly as well as take out a stone with a Soul Hunter charge (meaning no more teleport!). After a piece trade, I felt I was ahead, and Krueger came forward to swing the tide with his Feat and went down to 1 Fury, casting Earth’s Blessing on himself to finish his turn. As a Circle player you would think I would know what that does. So I had Shade burn his Feat in attempt to assassinate Krueger. That obviously didn’t work (thanks to the Animus), fortuntaely when I realized that it wasn’t going to work, I was able to go into damage control. Luckily there was a rocky out clove I was able to keep Shade behind. Following turn Krueger went all in to try and capitalize on the error but Megalith (with Lightning Tendrils) couldn’t reach Goreshade over the impassable terrain. Having survived the failed counter assassination, Shade was able to charge in and finish the Warlock. I was fortunate to survive that one!”


1st Lt.: vs Cygnar

“I was playing a local CT player, Ben Adams. He had Siege in his list pair, so I knew I was getting him; I decided I would counter with eCaine. I also knew there would be a lot of killing in this contest so I wanted to make sure that I was threatening his flag and controlling the wall in the center with Rowdy and the Hunter. Both of our units of Boomhowlers were deployed next each other on my left with his gun mages there as well, I would be relying on Heightened Reflexes and 4+ tough to save me (which it did). My Gun Mages and Black 13th were on the right across from his Storm Blades. First turn he ran and so did I but I was able to snipe out Boomhowler with the Hunter; thank god for 14″ and AD! He moved up and killed some of my Gun Mages and put Fox Hole on his Stormblades. I countered by using Ryan of the B13th along with Gorman for some nice AOE damage to take out the unit; then my Boomhowlers killed his. We continued to kill each other but he was losing out on attrition and while we were both starting to score points. He used Siege to Force Hammer Rowdy away from the flag that I had ran to control, dropping him to two focus and I took the opportunity to assassinate as we were both on our flags and he was too close not to try. I went with Jakes, Jr and Hunter to kill his JR to drop Arcane Shield, then two Gun Mages, Watts and Caine teamed up to kill Siege with the help of my Feat. I was the first one done but both Steve and Ant looked to be in good shape.”


2nd LT: vs Skorne

“I was facing Makeda2; in her list was a Titan, savage, Molik Karn, Cetrati, Nihilators, Hakkaar, and support. I decided to drop eCaine figuring he was best in this matchup due to ability to super solo and high damage output on demand. I was able to get first turn and jam up the board. A big Moment in the game was when Gorman survived a CMA from a pair of Cetrati after he successfully blinded some of them to slow them from getting to my zone. The blind bomb allowed Caine and Rowdy to clear off most of the remaining unit. After Gorman survived the CMA, he was able to blind the Titan and Karn for two consecutive turns. Once the piece trade happened and the blind bomb helped me hold up and clear the zone, I set the line of engagement so Boomhowler was able to Rage Howl and hold the line so that Caine could continue killing stuff while dominating the flag. Eventually I was able to kill the Cyclops which allowed, Caine to Feat and RFP Molik Karn leaving Makeda with no transfer target, so I was able to finish off Makeda.”


Round 2: vs Granite State Irregulars

Scenario: Fire Support


Captain: vs Cygnar

“Originally we agreed to Team Feat before this round to swap Steve and I to get me into the matchup with the Troll player who was boasting a rough matchup for Steve in the 3rd spot. My opposing Captain was Ben Cort, I lost the die roll, and still decided to use our Team Feat as planned (which in hindsight was a silly thing to do, as they would obviously have to Feat back), and Ben astutely counter Feated to swap the matchups back.

So Ben and I would re-match; honestly I didn’t have a great matchup for what I knew he would drop, which was eHaley. Last time we played I was list locked into Goreshade3, and this time I had a choice. I opted to go with Denny2, figuring I would get up field and faster with Denny2 and use my Wraith ability to stop the assassination. Well, the first part of the plan was easy, run at the opposing army and hope the opposing dice cooperated. Unfortunately I lost a bit more than I wanted to, but I was able to force Haley to Feat, allowing me to Counter Feat and full camp. Unfortunately I wasn’t able to get as much in the Feat as I wanted, so my Incoporeal was not able to save me from the assassination. Good news is I was able to keep the game going long enough that both of my Teammates had won before my game was over, so that part of the plan went off without a hitch! Thanks to my teammates for carrying me through to round 3, and grats to Ben for handing me my first (and only) loss ever in NETT.”


1st LT: vs Legion

“This game was against Greg Fournier; matchup would be eHaley vs eThags. I knew off the bat that I was going to go straight for scenario. I deployed my Nyss on my left and my Stormguard and ATGM on the right. We both ran and I took some pot shots. His second turn he brought his Raptors up, on my right, and tried to kill a few Stormguard. My turn I started with Haley and gave one Focus to each jack. I ran Thorn then Halely activated moved slightly forward, gave Dead Eye to the Mages and TK his Ravagore to face backwards and then Feated. My Nyss then ran engaging a few beasts and preventing him from getting to my flag. My Stormclad ran to the flag. My Gun Mages killed 4 Raptors (yay Dead Eye!), and then the Stormguard charged in killing the last one as well as put 13 points on the objective. Junior walked up and also shot the objective, killing it, and then Anastasia ran into contact with the flag giving me three points. With my feat up Greg wasn’t able to get much into contesting the flag even with the use of his feat.  On my turn I just used the ATGM to push the Angelius that he did position to contest  and then ran Haley to dominate the flag for the win. I then turned to Ant just to watch him lose, but fortunately Steve was well ahead closing out his game at the end of this round; on to round 3!”


2nd LT: vs Trolls

“I was facing Dave playing Trolls, and he opted not to go with the list I was more worried about, instead dropping Grim 2. He had a Bomber, Pyre, Fenns, Warders, Scatter Gunners, and other stuff I forget.. :). I dropped Kraye; opening up with Full Tilt on Stormwall, with Minutemen along side so they could both threaten the Fens and Bombers next turn, the rest of my force ran for position. Trolls opted not to drop a bunch of shots, but instead run to cover the board and be in the scenario.  In response I dropped covering fire with Stormwall and boosted a lot of shots into the Bomber and leave it with a couple of hit boxes. Then I had Ayiana Kiss the Fenns, and with a pod and Stormcalls do a number on the. I start pushing warders back with ATGM. Next turn I lose some Gun Mages and a Ranger, and the Minuteman as the Trolls crash my lines. Next Turn I finish off the Bomber and Warders, clear out the Fens, kill objective start so I can start scoring. He can’t respond, thus I win on scenario!”


Round 3: vs Team Muse

Scenario: Destruction


Captain: vs Cryx

“Seeing as I was not pulling my weight at all to this point in the day, and now I was facing one of the national champions from Australia at the helm of Team Muse, I knew I was time to kick it up a notch if we had any plans on repeating. My opponent (who just happens to be my new best friend in W/M) Aaron Wale, was playing eLiche2 and pDenny. I assumed I was going to get Liche as most often in the mirror that’s what my opponents have done. I was going with eDenny, I was right about Aaron choosing Liche; bad news was I lost the roll to go first. Liche’s opening moves were not very aggressive, so I took strong board position, and was able to run an Arc Node far enough forward to Hellmouth a Bane and catch Gorman. Following turn Liche layered his forces in, and prepared for impact, however he only was able to get about a half dozen models to the zone. On my turn, I crashed home, cleared the zone and Feated on the whole of the opposing Cryx force, and finished by scrapping the objective; three points to me. Aaron’s following turn he wasn’t able to do much but get the Hell Diver in the zone. I charged it with Denny and was able to use Dark Banishment to clear the zone again, winning the game on scenario. Glad to get a win in a contest like this! Having known Steve got Nigel out on the top of 2, we were on to the semi finals!”


1st LT: : vs Menoth

“I was playing John DeMaris from Muse and the matchup was High Reclaimer vs eHaley. This was a great game. His list was built for EHaley (thanks Keith) and with the amount of clouds he was getting down I was not getting much done. I had to feat first turn or face getting overrun and I used the opportunity to time bomb his stuff, kill the objective and get up quickly 3-0. I put John in the position that he had to kill my jacks and flood the zone to prevent me winning which he was able to do. He kept putting Knights Exemplar and Paladins in the zone and I was not able to kill all of them, or any of them for that matter. It came down to him up 4-3 with me only having Haley and the Squire left so I went for a wonky assassination that had almost a 000.2 % of working, which it didn’t, so John won on scenario. Thankfully Ant and Steve were able to pick up my slack so we still advanced.”


2nd LT: vs Khador


“This round I was paired against Nigel playing Khador and his Ocean’s 18 pSorcha vs eCaine. Nigel runs into position right away putting Sorscha behind wall on left side and his stuff up to woods on right. I put Heightened Reflexes on Boomhowlers move Caine up an inch or two and the rest of the force to the right further away from Scorcha then Magic Bullet a Gun Mage. Camp 2, and have Jr. put Arcane Shield on Caine. Had Ranger run to within 4” of Eiryss, I shoot him with Gun Mage and the subsequent Magic Bullet kills Eiryss. I felt pretty safe Sorscha could get up on attrition but not assassinate me; as with the wall and rough terrain in the way meant she needs to burn everything to actually try for it. Just didn’t seem like Nigel would go for it given the risk/reward of the situation. Turns out I was wrong, Nigel goes Boundless Charge on Sorscha and Behemoth, Wind Rush up, charges and pops Feat to get most of my army. Next he Power Boosted Behemoth who then charges his own Gorman to get max distance and in range of Caine, he hits twice, boosts one damage roll and does one non-boosted damage roll; does about 10 damage, failing to kill Caine. Fortunately, nothing else had Caine in range so the rest of his turn he spent killing random models. Caine shakes, feats and kills Sorscha… (ed. note: Nigel apparently hasn’t seen an assassination attempt he doesn’t like!).”


Round 4: vs Dark Omen Too

Scenario: Two Fronts


Captain: vs Khador

“Amazing that in the semi finals of NETT, two of the remaining three undfeated teams were both DOGC! Unfortunately we would be playing our own brethren in this round.

Shane and I have played a number of times leading up to NETT and Captain Con, so we were well versed in what this matchup would be. Shane, assessing the situation and knowing that he had not played his pVlad list yet on the day opted to go a different direction. He felt that even if he dropped his eSorscha, he might still lose the game; furthermore he believed his teammates were in VERY strong matchups with Alex against Meat Mountain, and a likely Lucant match for Steve; both ugly for Cygnar. So pVlad it was, he was gambling to ensure if his team won he would have his best list in the Finals; a well played and courageous decision by the captain. In Two Fronts, I did indeed drop Denny, and I was not able to get first turn this game either. With Conquest and Behemoth, my whole game plan was to win on scenario. Shane ran his army out as best he could to make sure scenario wasn’t a foregone conclusion; I also went up the board quickly. Used my pieces to pin the Khador force back and mostly  off their own zone. The objective was an unwitting ally for me keeping the Colossal at bay. Next turn, Shane did what he could to get into the zone with the IFP. It wasn’t enough, with Curse of Shadows, and my speedy units, I was able to clear the zone, killing Behemoth and Feat on most of his force to score 3. On the following turn, Shane ran Vlad to the zone with Malakov and a couple of remaining mechanics that were all not in the Feat. Denny came forward and dropped a Hellmouth to clear the Mechanics and was even able to one shot Malekov; for a quick end to the game. Now to see if Shane’s gambit would work, checking in on my teammates.”


1st LT: vs Trolls

“This match against our own teammates and I get our friend Stu playing Meat Mountain! I had a feeling this was coming. I was able to duck Stu the entire time I was in Ireland and was hoping that I wouldn’t have to play him especially since I wasn’t playing Stryker which sucked. But here we were, in round 4 and I needed to make the most of it. So little advice to Cygnar players, Meat Mountain suuuuucksss, and I would say our best options are Stryker and Siege. I played Haley because with Time Bomb, TK, my feat and Gun Mages it lets me delay the engagement and try to screw with him as much as posssible; which is what I did. Stu did exactly what I thought he would, one unit of Warders and Champs to each side and Mulg and the Axer in the middle with the stone behind them. So I used the Gun Mages one the left to push his Warders around and the Silver Line in front of them to deny charges. On the left I used the Nyss Hunters in full 10 man CRA to pick off a Warder coupled with Eiryss’ Death Bolt. I used Thorn to slow the Warders down and the Stormclad to kill them. Now this game probably goes well for me if I feat turn 2, I keep Anastasia and probably wipe the units on the right earlier but I FORGOT TO FEAT (yeah buddy)!! Well Stu made me pay, killed Anastasia, hurt Thorn and pretty much wiped out the Silver Line. I responded by Feating, and killing some stuff; unfortunately he killed more. I then killed Mulg and the stone but had left Haley open to Grissel and he got in there and killed me. But once again Ant and Steve cleaned up my mess.”


2nd LT: vs Convergence

“We had a weird list chicken at the start of this game with both of us playing a list the other wasn’t expecting. Matt ended up playing Iron Mother (and not Lucant) with Axium, Corollary, Mitigator, 7x Diffuser, min Reductor, and repair stuff (list on Captain Con episode of F2F).This was a match I was not looking forward to, seeing as we both counter guessed incorrectly, it ended up in an assassin duel. Basically I start well with my positioning, however a mistake cost me Boomhowler (after I changed my mind with Rowdy’s final spot). I had a chance to get Mother around turn 4, but I botched the activation order and turns out I was out of range with Caine; fortunately I was able to Gate Crash to safety with Caine; in retrospect I should have just jammed the lines. Same turn I had also successfully Black Oiled the Axiom which Alexia was blocking from getting into zone. Following turn Mother goes Feats, casts some spells and fires her gun. Then that nasty Diffuser group goes; I lose a lot but he doesn’t move Mother away, and luckily leaves Eiryss alive (but engaged in melee) and I still had a couple of Gun Mages and the Squire.. Caine took some damage that turn, and I was running out of pieces; so I feat and go for it. The remaining ATGM push a couple models and clear Eiryss; the Mage Hunter aims and clips Mother dropping the focus, and it’s go time with Caine. Needing 6 to hit missed a bunch attacks (oh dear), last damage roll needed a 6, get it and somehow we advance!!!”


Round 5: vs Team Ontario

Scenario: Incursion


Captain: vs Cryx

“My first game against Tim Banky, and I have to say he is not only a great player but a great part of the community and a real boon to the budding Canadian meta! We were playing mirror warcasters, and I was fairly certain he was going to run G3. I really didn’t want to the exact mirror match game, so I decided to zerg and go with eDenny. On the surface this seemed like a bad matchup as my Incorporeal would save me nothing; turns out that is exactly true! However, I was very concerned that my match was going to be pivotal in this championship bout, so I wasn’t about to tuck and run. Banky jammed his Kraken down my throat quick on the opening turn. However, I wasn’t able to get any charges on him in retaliation (thanks to his strong positioning), so I tried to keep my pieces ready to counter hard next turn. I opted not to Feat, which proved to be a pivotal decision as I felt I wasn’t going to get enough to warrant it, and could possibly die to assassination anyway. Next turn Kraken crashes home and cripples the Nightmare. and with most of the rest of his force out of real threat, he doesn’t do a ton of other damage, but closes ranks quickly. I follow up by Feating on my turn and catching nearly all of his army; the fact that everything had closed in meant that I also got to use the Feat offensively. So I did a ton of damage on this turn, cleared out all of the Soul Hunters save for one way in the back, (outside of Darrage Wrathe Command), and locked in the arc node; lastly putting a bunch of damage on Kraken. Bad news was I didn’t get Goreshade. However, I was able to lock enough in where next turn Banky couldn’t muster an assassination turn. The game started to turn back to me from this point on; next turn I finished off Kraken and Goreshade was forced to back off and regroup. Denny took position behind a nearby wall and was able to clear a bunch of models off the table leaving Shade mostly alone. This forced G3 to come forward and try to mount the comeback my himself; however he wasn’t enough and was overwhelmed next turn. Looking to my teammates it turned out we had already swept 3-0 to repeat as NETT Champions!!!”


1st LT: vs Menoth

“My opponent, Chris, was running an interesting Feora list using four jacks including the Judicator. I got lucky that he had quite a bit of rough terrain on his side of the board, with two pieces of rough terrain off-centered from the center flag. I deployed as I normally do with my eCaine list, with the Boomhowlers on the left and Gun Mages on the right. He had two of his jacks on my right and his Vanquisher on my left. He ran and I ran to open the game; I tried to snipe out the Monolith Bearer in his Zealots unit but I failed to hit boosted 7s. The flag on the right disappeared and he tried to engage everything. He did serious damage to the Hunter but not the Boomhowlers as they stuck around with their 4+ tough. His Vanquisher was stuck in the rough terrain even with running and Escort. I started my turn by using Jakes to Energize the Hunter and move him to contact the flag since he couldn’t run because his movement was out; stupid Zealot grenades! I used the boomhowlers to engage the Vanquisher and prevent the movement of the Zealots to the flag, I love medium bases!! I used Eiryss to move within 5″ of all the other jacks and deny them focus and then shoot his Vanquisher for a little extra insurance. The Gun Mages took pot shots at the jacks and the Black 13th dropped a Mage Storm on some Zealots for next turn when they weren’t invulnerable. I moved Caine into a position behind a wall and close enough to move to the flag next turn; making it 1-0. With the Boomhowlers in the way having 4+ tough with Heightened Reflexes, and no Focus for the jacks, Chris couldn’t get anything to the flag; I went up 2-0 on his turn. Bad news was my Hunter was on fire and he died on my turn; that tough little jack. So on my turn I killed as many Zealots as I could, put Arcane Shield on Caine, blocked in the Vanquisher and moved Caine to the far flag scoring up to 4-0. At this point Chris had to go for an assassination but he couldn’t free up the Vanquisher, he was able to kill Eiryss and Feat focus back to his Judicator to shoot Caine but that only did a few points. I was on fire but even a box cars wouldn’t kill Caine, but the Vanquisher was able to move within four inches. So I used Aiyanna and Gorman for a -4 armor swing and feated with Caine to take the jack off the table and win on scenario with another domination. Just as I finished up Steve won with an assassination so it was time to break out the whiskey!!!”


2nd LT: vs Cygnar

“My Finals opponent was Dustin playing Cygnar; he ran Haley2 with StormWall, Squire, Rangers, Gun Mages, Storm Blades, Junior, Victor Pendrake, and some other stuff. Cygnar mirror match for me means Caine2. He runs stuff up on the opening turn; I run as well, put blur on the Gun Mages, Arcane Shield on Boomhowlers, Magic Bullet a Ranger to bounce off Stormwall into something but missed. Chris takes the dice, pops Feat, however Stormwall whiffs, and Boomies tough. Under feat I Black Oil my own Boomie to catch Stormwall, then Rage Howl. Caine cast Magic Bullet on himself twice and shoots Stormwall a bunch to bounce into Haley; does 8ish damage. Alexia grabbed a couple of Souls during the Feat, so she was loaded up for my counter next turn. He is able to get Haley to far flag to dominate next turn, and kill Alexia. Rowdy knocked down Gorman  who survived a non boosted pod and stormcall (his lucky day!!!). I decide to go for Magic Bullet assassination. I hit Haley with Jr somehow and do some damage, then Eyriss hits for a couple points. Unfortunately Gorman missed Black Oil on her which deviated onto a Stormblade. Caine charges my own Forge Guard and uses his Second shot into Stormwall with Magic Bullet, but just short of the 4”. After assessing and not wanting to blow the assassination, I realize I can shoot my own Stormblad that was black oiled. Magic Bullet myself again, buy a shot and this time get Haley with Magic Bullet Damage… let the drinking ensue!!!”


~~~~~~~~~~


What a weekend for DOGC at Captain Con, with 4 players qualifying for Masters, and Anthony ultimately winning; repeating as NETT Champions was the crowning achievement!!! Red Steve is MVP for this year’s run going undefeated leading the team to the title from the 2nd LT spot; and to the victors go the spoils and another year holding on to the historic trophy!!!


NETT Champions 2014 – Back to Back!!!

Dark Omen Open Practice update 1

Something Dark Omen wants to do in 2014 is get out and meet more people and have some great conversations and really get to know New England. While we get to hang out a little bit at tournaments with everyone, we wanted something a bit more intimate. We came up with “Dark Omen Open Practice”!

What is Dark Omen Open Practice? We will be traveling to stores all around New England to spend the day hanging out and playing games. While our general practice structure is 50 points, 2 lists and on the clock, we will play anything! Our goal is to show up at your store some time around when it opens, play games until about 6:00 and then head out for some dinner in the area.

So far we have had a blast in our first three events at Gamer’s Gambit, Temple Games and Hobby Bunker. We have expanded the schedule to add even more places filling up our year!

The Only Game In Town ( NJ) – Canceled and to be rescheduled.

The Dragon’s Den (NY) – October 25th

The War Store(NY) – December 13th

As we work towards next year we have already had some requests. We want to go where you all are so please let us know if your store would like to host us for a day in 2015! You can contact us through Shane York on Facebook, through our email (darkomenclub@gmail.com) or contacting Jestor on the Privateer Press official forums.

We are looking forward to playing some games with everyone soon!

Hardcore Win at TempleCon – Anthony Rides the Goat to Another Title

The Hardcore at this year’s TempleCon was quite literally, round by round, the best test and set of games in one tournament that I have played to this point in my competitive Warmachine career. I played against five truly great opponents with some exceptional lists, and was able to run the gauntlet to the top. I’m still quite amazed at the accomplishment given the challenge; this one will be one that I am proud of for a long, long time.


Leading up to TempleCon I had started to grow curious about how my eMorvhana list would perform in the Hardcore format. I took it to a tourney in the NYC area and was able to come out successful and feeling good about the list in the format. As such, I resolved that if I was able to qualify for Masters before Saturday of the Con, I was going to make a run at Hardcore. As it would turn out, I was fortunate to be able to get out to a quick start and qualify on Thursday, so on Saturday I broke out my eMorvy and made a go.


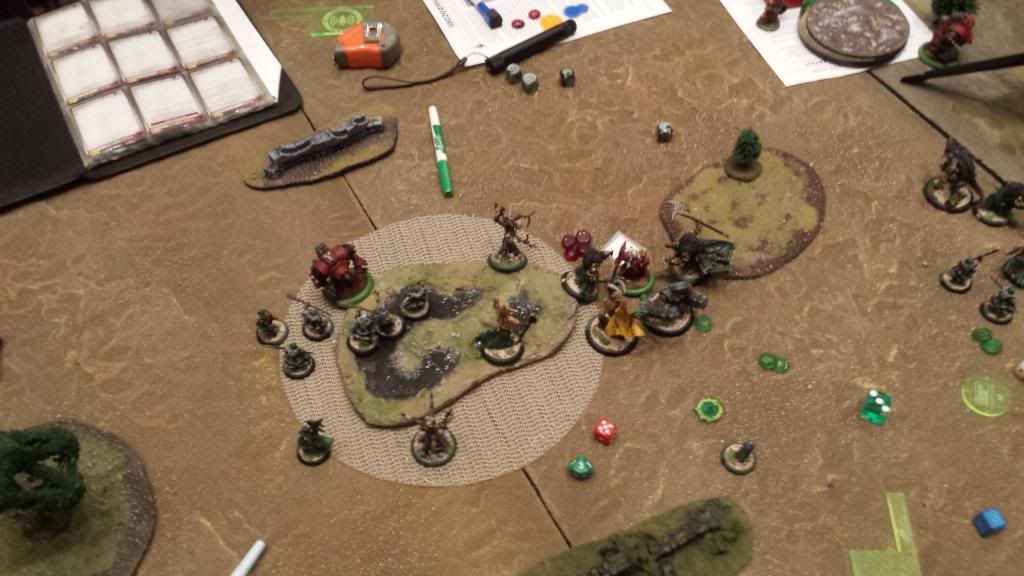
The 2014 Hardcore format, much like 2013 really pressures players to push their lists into the middle and play; my particular build can do a great job of getting to the center of the board making my opponent make difficult decisions quickly while my pieces are bearing down on the opposing lines. Also the heavy recursion mechanic in the build also bodes well for pushing more models back into the zone as well as really putting a lot of pressure on my opponents to keep up with the model trade. My list has not changed from it’s original version throughout the whole run, and in case your not familiar with it:


eMorvahna

Feral

Wold Guardian

Tharn Ravagers (full) w/ WA & UA

Skin Walkers (full) w/ UA

Wolves of Orboros (full) w/ UA

Stones w/ UA

Gallows Grove x 2


With my history of playing Cryx in Hardcore, I do not have trouble getting through a lot of activations quickly, so I am comfortable with the amount of models. The significant difference with this compared to my past experience is the number of additional die rolls this list makes with the multiple attacks, buying attacks, and re-rolls. So learning how much  to push things and when to use all the extra resources was the hard part. Fortunately I have had a lot of opportunity to play the list over the past 8 or 9 months, so I had a pretty good handle of what is needed and when. However, given the level of competition I would see in this event, I would need to muster all the skill I had.


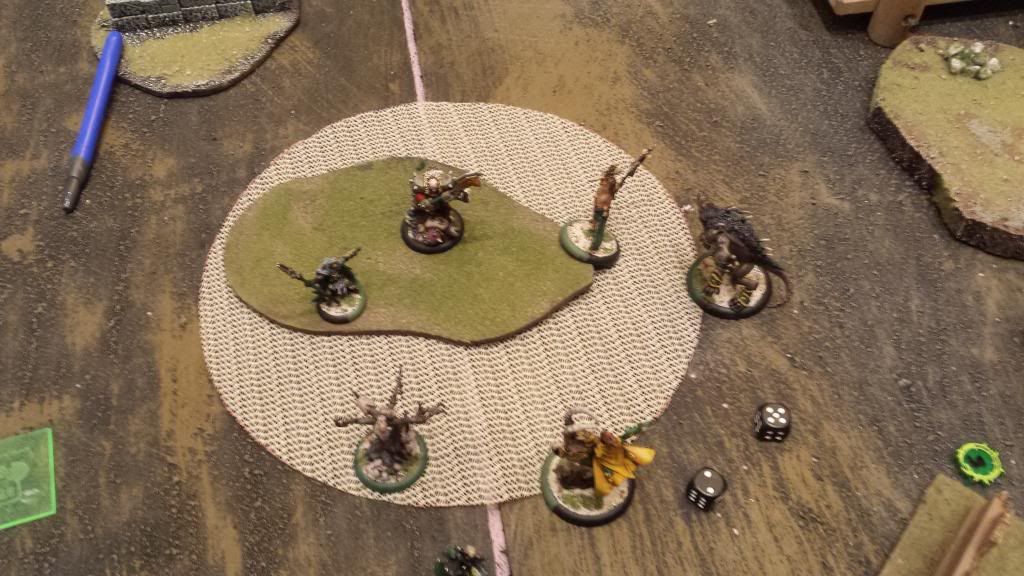
Round 1: vs eButcher2 (tier)

Synopsis: There are a few matchups I really don’t want to see with my eMorvy list and after I surveyed the field before the event, there was a couple of lists I definitely wanted to avoid. At the very top of the list was Tom Hoffman, the defending TempleCon Hardcore Champion and his Doom Reaver spam list. The Doom Reavers can one shot my Ravagers, and, even worse, on a charge can one shot my Skin Walkers as well. Moreover Berserk means they are doing more work per model than one model normally would. I narrowly escaped it when I faced it at GenCon in Masters and in a condensed time format it would be decidedly worse being that it’s so well suited to pick me apart. So who do you think I get in the first round? … Tom Hoffman it was. The last time that Tom and I played it was TempleCon 2012 and also my first ever competitive Warmachine game at a Con. Certainly a lot has changed since then, and Tom and I have had some good banter back and forth about the eMorvahna/eButcher matchup. So while I’m not relishing this matchup in the opening round, I’m excited to have a go against an awesome player like Tom.


Going into the game, as I said earlier, I felt that Tom had a list advantage and to make matters worse he had first turn. There was a forest in the middle of the board that was going to impact the game; I had more Ravagers than he had Man Hunters. So I was hoping this would slow down the Doom Reaver rush enough to keep me in the game long enough that my Feat would put me over the top late. So on the opening turn the opposing line came blazing up the board, with Fenris bringing up the rear on my right side of the forest, and Butcher holding down the left of the forest in the rear guard. The Doom Reavers were funneling around the forest and creating layers in a strong positional set up by Tom; it would only allow me to deal with the front line. Getting the dice on the opening turnI made a quick decision to sacrifice my Stones and use them as Death Knell beacons to clear the front Doom Reavers allowing me to spring into the second line. I focused on the R side first as I had a wall on my near side for Morvhana to hug (benefits of going second). I dropped one Stone out in between four of the nearest Doom Reavers. I used the Stone Keeper to Rock Hammer (targeting the Stone) damaging the two nearest Doom Reavers, thanks to re-rolls. Then I was able to drop a Death Knell (through a Gallows Grove) to clear the other two. Then I sprung two Ravagers over and a Skinwalker into the next line to clear another half dozen Doom Reavers, leaving Reach models blocking my rear lines. The WoO on the left launched forward with the help of another Ravager to clear about five more off that side and one Man Hunter. I was not unhappy, but not feeling great, as the first turn of real damage was about to come my way, I knew Tom was going to get the most out of every model.


On turn two, the lone Warjack in Butchers battle group started to come forward, around the left side of the tree, and I lost my front swath of troops to the oncoming Doom Reaver charge. Turns out the front row of reach troops and distance I left between my models meant the Doom Reaver horde  was not able to reach further into my lines. Bad news was Man Hunters were pressing off the left forest seeing right through and Fenris astutely set to counter anything I did and threatening to win the game on the Feat. When I got the dice back I presumed Butcher’s Feat was coming next turn, so I wanted to get as much off the board as possible to limit the damage it would do, but I also needed to protect a few pieces so I could Feat to gain the upper hand. I started with a similar move as last time, dropped another stone forward on the right side to clear more models with the same combo used in the prior turn only being this time Morvahna was close enough to move out cast at the stone and Light Calv back. With the path clear three more Skinwalkers were able to get into the Doom Reavers and clear about five more. Then the Ravagers got into the mix and cleaned up about another half dozen models, and the WoO were also able to get forward and take out another six themselves. Bad news was my force was mostly completely exposed to the Doom Reavers at this point, good news was the horde of maniacs running at me was down below half of it’s starting numbers. Most importantly I was able have one model in each of my units safely tucked back; now I was  hoping my positioning was good enough that I wouldn’t lose a whole unit. With a deep breath I turned the dice over to Tom bracing for the Feat incoming.


Tom did in fact Feat this turn, and was able to dig all the way to the my rear lines after the Feat move with a few important models. He was able to get my Stone Keeper, my last Gallows Grove, my WoO UA, and both my Ravager attachments (using his Juggernaut to do so). I still had a few models in each unit left, including a couple Ravagers and about four of the WoO unit and one Skinwalker left. It was a decisive turn by Khador, I would be able to Feat my models back but I would only have limited models that could actually attack on my turn; this was my fear entering the game, would I be able to do enough with the active models I had left to limit his retaliation on the follow up turn. If this turn went well, my hope was I would put myself into position to start getting Pressure Points next turn. So I started with Morvahna, killed the nearest Doom Reaver engaging her. Moved Carnivore to the WoO as there was more of them left alive (and thus more able to attack and leverage the healing on Morvy), and then Feated down to a single HP to bring back 15 models that I had lost including bringing the Skinwalkers and Ravagers back up to full.The Feral trampled about three Doom Reavers to land next to Fenris, doing enough damage to dismount him, and hitting all of his attacks on the Trample. Then the WoO activated to clear the way for the Wold Guardian (and heal Morvahna back up to about half life), I was able to get my heavy beast into the Juggernaut to bring him down to barely functional. Then the remaining Ravagers charged and finished off the Jack. Feeling good about this turn, I had already survived eButcher’s Feat, and pulled ahead after my Feat; I was feeling like I was finally ahead in the game having the only two heavies left on the board.


The next turn was Butcher’s first to really get into the game. His resources were limited, and dwindling but he began to level the playing field with Lola. He came into the forest to clear a number of Ravagers, and his remaining force started to clear out what was engaging them as they had now been jammed in place by models Morvahna brought back with the Feat. Fenris was able to do some damage to the Feral, but not nearly enough.When the turn was over, there was only a single model in the zone besides Butcher; this meant I had an opportunity to start to put damage on Butcher with a Pressure Point. I took the dice and used my remaining pieces to clear all the remaining models besides Butcher. I trampled Wold Guardian into the zone however, was not able to put a scratch on the Warcaster. I was able to Control the zone scoring the first Pressure Point meaning Butcher would eat five points of damage.


With no models left and a heavy in the zone, Butcher had to deal with the Wold that was in his face, so he went to town on the beast dispatching him; and realizing that I still had the Feral and a few pieces left, Tom decided to blow the rest of his stack to clear as many models as he could reach. taking another five damage because I was still controlling the zone. I took the dice back knowing that if I moved Morvahna to dominate the zone, it would only take a few points of damage on Butcher to end the game. So I charged with the remaining WoO UA that I had feated back and as fortune would have it, they still had the mini feat! So I popped it and landed what would be enough damage to end the game once Morvahna moved into the zone. So Tom and I shook on an awesome game played! This was a monster win to get in the opening round of the tournament, and I was happy to be on to the second round!
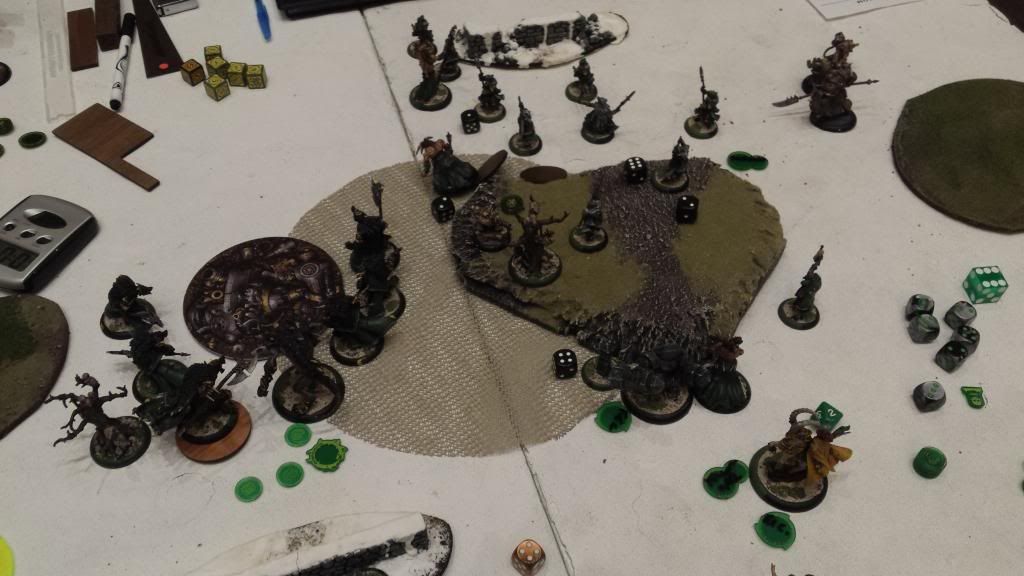


Round 2: vs Gorten

Synopsis: In my second round I faced the fifth international player I had played on the weekend to that point He and I had played before, at TempleCon 2013 in the team tournament. He was playing Gorten then as well. However, since that time the Earthbreaker had come out. This really was a huge issue for me because He has the Auto KD on the two main guns, and normally I would keep myself immune to blast damage by staying B2B with the Wold Guardian, however with the Quake shot that would only make it easier to KD Morvahna and lose the game. That said there was also limited time to react and I was going to have to pay special attention to how close I got to the Colossal. I didn’t see it right away, but this really was very bad for me. Luckily I had the advantage of having a quick list, in shortened Hardcore turns.


I did win first turn and ran my Skinwalkers out on my right side and the WoO out on my left. The Ravagers went up the middle to the top of the hill where their DEF bonus would not be benefited versus the Colossal thanks to the Driller rule. Morvahna put up Fog of War and put Flesh of Clay on herself then separated from any nearby models. The Guardian and Feral moved up into the Stones that had ported further up field to threat the position of the Earthbreaker, just behind the Ravagers. My opponent took the dice ran the Colossal into place, and pushed his Forge Guard up as far as they would go. Dropping a wall out in front of himself, Gorten moved up to a strong position behind the Forge Guard, and was flanked by Arcanist Corp. The support solos moved up behind Gorten and the other infantry moved up to oppose the WoO on my far right. Lastly the Basher was able to circle out from behind the Earthbreaker and position between the Colossal and the Skinwalkers.


Turning the dice over to me, I charged the Skinwalkers into the Basher, and was able get some very good damage on him. The Ravagers then charged forward and got into the lines of the Forge Guard. They were positioned well so I couldn’t get passed them, but was able to get around a few to hold the Earthbreaker in place. The front of the Forge Guard were wiped, then the WoO launched into the infantry on the right pushing the line forward. I moved Morvahna to the very edge of the kill box as far from Earthbreaker as I could be, and up kept Fog of War and re-applied Flesh of Clay, this time moving Carnivore to the Wolves. Then I moved the Stones further forward, and put the two heavy beasts further forward to threaten the Colossal. My opponent took the dice and operated confidently, putting Tune Up on the Earthbreaker and then activating the Basher to Flak Field the Skinwalkers and using his attack to kill one.  Then the Earthbreaker when to work on the Ravagers and Skinwalkers nearest him. He put boosted shots into the Ravagers in front of him and the Skinwalkers near the Basher. Then used his Repeating Cannon to start taking out the KD Ravagers and Skinwalkers, taking out four of them was a reasonably productive activation. The Forge Guard then counter assaulted the Ravagers and started to thin their numbers even more. Gorten pressed forward still and put the Rock Wall back up and the Arcanists again moved to protect the key solos.


This was not going well as I took the dice back and I had to spend a minute to think through my turn. I was going to have to Feat this turn or risk losing my most important units. The WoO were going to be able crash home, but I knew my opponents Feat was coming next turn, so I would likely have two turns of non productivity out of my models and risk wasting my Feat on models that would just die on the following turn. The next important piece was that I was going to also have to be mindful of where Morvahna ended up. I really had no opportunity to go anywhere else with her. I decided to port the Feral over to the Basher to finish him off and spring the remaining Skinwalkers into the Earthbreaker to continue to hold him in place. So that’s what I did; the Feral ripped through the Rhulic jack quickly, allowing the last couple of Skinwalkers to get into the Earthbreaker. They were finally able to put some damage onto the Colossal; then the remaining Ravagers launched into the Forge Guard getting the UA to the Colossal. He landed a big rip on the Colossal meaning he had some measurable damage at this point. Morvahna then replenished her forces with the Feat and reapplied Flesh of Clay after upkeeping Carnivore and Fog of War. The Wolves then got into the mix with the remaining Forge Guard and cleared them off mostly, save for about two, healing Morvahna quite a bit. The new forces were successfully jammed into the opponents remaining pieces with a comfortable layer ready to counter assault after the retaliation next turn. I turned the dice over to my opponent feeling okay about where I was.


Gorten’s turn to Feat, and he activated first, pushing into the lines, Feated and pushed all the nearby models back and away freeing up his own remaining pieces to charge and push the line back further protecting his support that was keeping him in the game. Then used his Dual Handcannon to start taking models off. Then his remaining Forge Guard came forward and cleared out a couple of Ravagers. Then the Arcanists started to throw Flame Blasts at Wolves taking out some of the nearest, and dropping one cloud in front of Gorten. Then Thor Tuned Up Earthbreaker again and he used his guns again to clear out the Skinwalkers nearest him, KD the nearest set then putting them down with boosted damage shots from the Repeating Cannon. It really was tilting to have that shoot things down he was in melee with that are normally a bear to deal with. With most of my remaining models affected by Land Slide, my retaliation was going to be limited. Good news was the Feral was not affected and within charge range of the Earthbreaker. So that was the first order of business; if I could finish the Colossal this turn, I felt I would be able to hang on to win the game. So the Feral charges the Earthbreaker and puts six attacks into him doing enough to get him down to just a few boxes. The Wold Guardian was teleported in by the Stones into melee with the Colossal and was able to finish him off. Feeling great about that, I moved what Ravagers I could into melee with the nearest models and started to swing. I cleared the rest of the Forge Guard, and clipped an Arcanist. The Wolves had a few models outside the Feat and I was able to get two of them to Gorten and mini Feat for Power Swell. They did some reasonable damage on him (about half his HP). and the remaining models move forward into the group of support solos. Morvahna was now back up to full health, and camped three Fury upkeeping both spells again and reapplying Flesh of Clay. My position felt very strong now, and I felt that I had to make it through whatever last ditch effort Gorten had I was moving on.


On the final turn of the game, my opponent assessed his options and realized they were very limited. He opted to keep all his Focus, and try to kill the Guardian. After all his Focus was spent, the Wold was still standing; with two heavies looming over the Caster my opponent opted to concede the game. After a scary round two, I was onto the third, hoping for a bit of a reprieve in the matchups before the late rounds.
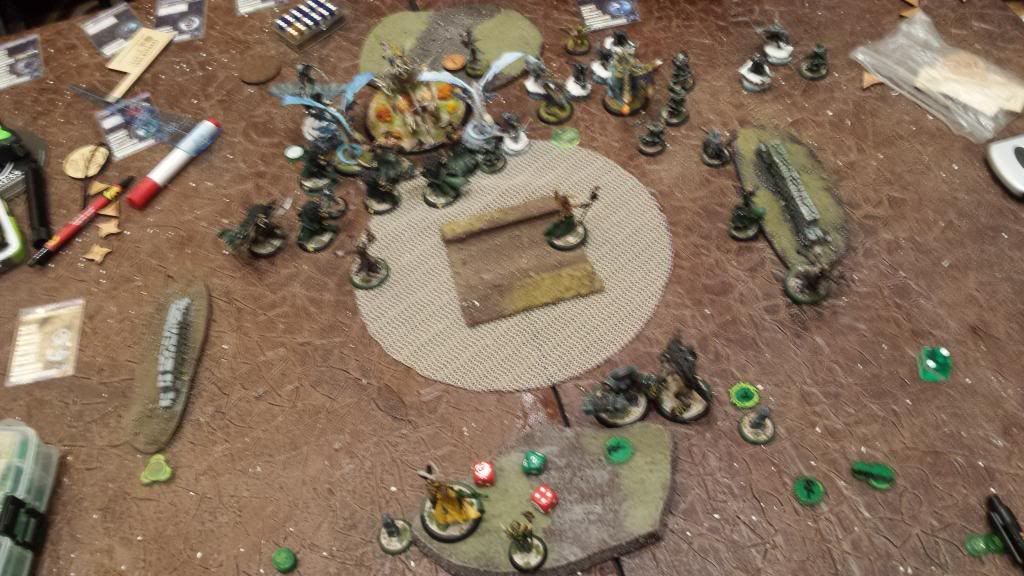


Round 3: vs Lylyth3

Synopsis: As I was saying, after last round I was hoping for a reprieve, only to look up at the board and see I was playing one Jake Van Meter; so much for that reprieve. I had just played Jake the night before in the team tournament, and seeing as I pulled that game out of my butt with Mohsar, I was pretty sure I wasn’t beating JVM twice in the same weekend, but we would give it the old college try anayway.


I did get first turn, but in this case it didn’t matter, the Legion list had plenty of guns, with a unit of Striders, Angels, Ravagore, Lylyth herself… you get the picture, there was a lot of guns. What’s worse is that Jake going second gave him the chance to get his guns across from where he needed them to be, the high volume low pow Striders would show down right against my WoO on the right flank and the battle group would lean on my Ravagers and tear into my multi wound models. Unfortunately I did not have a choice I had to get across aboard; if I was fortunate it would not cost me my Feat to get there. Up side was Jake wasn’t coming to me and this was Hardcore, so there was a punitive kill box and a short clock for him to contend with.


Opening turn, I blast across the board and threat saturate like a champ. I had a hill on my side of the board where I put my battlegroup blocking LOS to Morvy, and had a command bunker, WoO running up my R flank and the Skinwalkers advancing up the L,and Ravagers up the middle. I tried to space a layer that would leave some of his guns out of range of my second wave in hopes of saving my Feat. Jake took the dice, and as you might imagine I wasn’t successful in my positioning. The Striders on the R took out a half dozen WoO, and the front four ravagers went down to the battle group. He burned every inch of his clock to get through the attacks and made sure Lylyth was inside the kill box as to not take auto damage next turn; dice back to me.


So, that went as expected and unfortunately even running my second wave would not engage enough and as such I was worried about losing too many models to recover with my Feat, so Jake had successfully forced me into my Feat on the top of two. I was able to rush forward, engage his line and Feat my lost pieces back onto the table and engage the jam to slow his guns down, and put the pressure on him, half my models engaging his and the other half pending retaliation; clock back to Jake. He took a long minute to ponder the turn on how to not lose the game next round as Lylyth was potentially going to be exposed so this was his Feat turn. His plan was to Death Chill the rear line and wipe the first one. The support pieces came forward and started to clear the front line out to allow more shots. That was a tall task, and wasn’t as successful as I suppose he would have liked. He did successfully Death Chill or kill most of my Ravagers thanks to Angels, Overtake, and Lylyth. When he put the dice down, I only had about six models left alive that were not Death Chilled.


Well, my Feat was successfully burned, and he had managed to attrition me down to where he would have the piece advantage by the end of his next turn. I surveyed the board and decided to go for assassination, as Lylyth only had a single transfer left. I believed I could get four or five models to her, and spring a couple Sunder Spirits to finish her off. I up kept Carnivore on the WoO and for some reason had thought I had it on the Skinwalkers. So when I went in with them I needed hard 9’s to hit and not the 7s I had thought (thanks to Tenacity); to make matters worse Morvahna was out of range for Scales of Fate. I was moving quickly, and never thought to CMA, but it mattered not as my dice loved me enough to land two of my four attacks (yay Rapid Strike) on sweet 9’s. Then got one Ravager in on her, at MAT 9, who, after careful judge measurement, was within reroll range, and landed the blow that Lylyth would transfer. Then I tried to get two WoO into Lylyth with mini-feat up, however, again after judge help, it turns out I could only get one in, but it was still enough to get her down to very few life points. Given I only needed a couple points, I did not want to risk re-rolls on non boosted attacks, I went for one fully boosted Sunder Spirit, and landed it finishing the job.


It was a fast and furious contest with not only one of the best players in the game, but one of my favorite people to play with. I think we both knew what the others plan was, it came down to getting the chance to pull the trigger, and having the dice cooperate when it was needed. I was fortunate to have the chance and do it the old fashion way… who needs re-rolls anyway? 🙂


Round 4: vs Retribution

Synopsis: In the semi-final round I was paired up with Tucker, a local CT player whom had knocked off one of my teammates, Walter, in the last round. He was playing Kaelyssa infantry spam with eEyriss3 in the mix. Out of the three games I had played so far, I felt the most confident in my list heading into this match. High DEF infantry is what this list does well, and my recursion mechanic was strong in this matchup. I wasn’t going to get the alpha, but I wouldn’t need it as my Reach advantage was significant; just needed to avoid dying in a silly way to Energy Siphon.


Tucker jammed across the board quickly and popped Feat to ensure he would get ahead quickly. So I spread my Reach advantage across the front lines, and made sure to put Flesh of Clay on Morvhana to stop anything dump from happening and put Carnivore on the WoO. I felt like the next turn would be the worst of it, I braced and flicked the clock back.


Retribution did the best they could to crash home, and the Reach did mitigate what they could do significantly. There was a lot of gun fire from the MHSF that cleared off some of my front layer of WoO allowing the lead Infiltrator unit to get into my lines a little deeper. The Ravagers held their portion of the board up and the Skinwalkers were left largely alone being the farthest away. Getting the dice back, the damage incurred was not so bad at all. I countered with the WoO who were able to get some good work done. Then the Ravagers responded to clear another swath of models, including putting damage on a light jack that had come forward. Before I activated the Skinwalkers to crash in behind the Ravagers, I had Morvahna rotate Carnivore to them in order to get the most out of their attacks, she also Purified off Phantom Seeker from Kaelyssa before retreating with Light Calv. I decided not to Feat, as I felt that my units were mostly safe, and that he wouldn’t be able to clear them off during the next turn based on my position and jam. This was risky, but if it worked I would be well ahead next turn. Lastly my Guardian ported in to finish off the jack, and bait his remaining jack forward.


With Ret now back on the clock, Tucker lined up an assassination on Morvahna. He had his arc node forward, and his heavy to clear a path for some spell slinging. Eyriss’s unit crashed in and unfortunately her targets were Skinwalkers. She would have to kill a Skinwalker to generate a Quick Work shot on Morvahna. Fortunately he was unable to kill the heavy infantry which stops the assassination train. Full fledged damage control mode was the next play for Retribution, and on this turn, they were not able to get their full offering of attacks, meaning that the game was about to tilt into my favor. He did commit his heavy to kill the Guardian with some help, but his heavy was in my face and I was down one.


Getting the dice back, I knew this would be Feat turn for me, with the assassination failed, it’s time to capitalize; started with Morvahna, who feated back nearly all the models lost, and then I elected to box myself after the turn was over, so I would not be in danger of another assassination, and was sure to put Flesh of Clay up before I was done. Next we teleported the Wold Guardian in order to wipe the arc node further reducing any chance I could get clipped, and then the Ravagers surged forward to through the forest in the near middle of the table and cleared most of the infantry in the kill box; the Skinwalkers mopped up the area so it could be scored. The Feral charged in to finish off the heavy, and lastly the Wolves got into the last remaining pieces of the gun lines jamming them out. Carnivore healed Morvahna back to more than half her life, I took a pressure point at the end of my turn, but scored one in return.


Kaelyssa had most of her force gone, so she was forced to jam whatever was left into the zone, and put every available attack and shot on the Feral. Thanks to some hot rolls the Feral was unexpectedly taken off the table. The Warcaster moved around the forest camping what she had left and she took a position to try to threaten Morvahna next turn if she survived. On my turn with most of my army now back on the table, I moved all my pieces to clear the zone again. With another pressure point impending, Kaelyssa had moved into range of a Gallows Grove from which I could safely arc a boosted Sunder Spirit into her. I only needed a few points of damage at this point to auto finish Kaelyssa.when Morvahna moved into dominate the game was over. I got what I needed from the SS, and moved to the zone to finish off the game.


Phew! That one was way too close for comfort. The Energy Siphon is very serious and the Eyriss3 tech is scary as well. Eating the pressure point I felt like was the right thing to do given how far I was ahead on attrition, and it’s worth noting, why give your opponent a 20%er if you can give them a 0%er? Now… Onto the final!


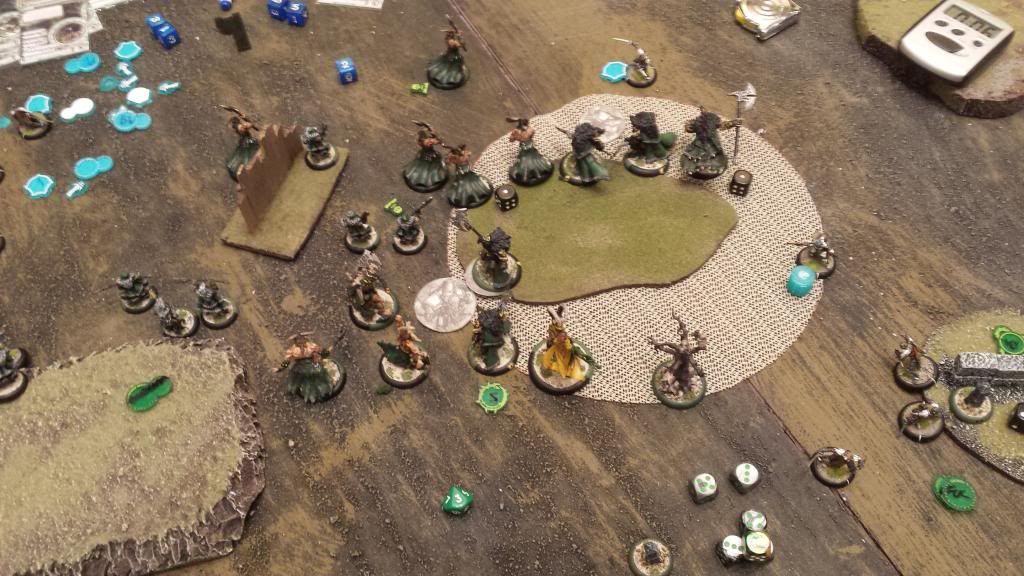
Round 5: vs Butcher1 (tier)

Synopsis: As fate would have it, there would be another final table in a high profile event at a major con for Chuck and I; as he likes to say we only like to play at final tables in big cons :-). Chuck and I agreed to turn off the round timer on this one (with PG permission) and go until there was a final winner, as we didn’t want a TempleCon Hardcore final coming down to who jammed what into the zone as the clock expired. We wanted to see a Hardcore win with a caster dead; as it should be.


With that, it was pButcher and a Claws of the Dragon Tier list that stood between me and my first Hardcore win at a Con. They won the roll to go first (Tier benefit) deployed their two jacks in the middle with either unit of Black Dragon IFP flanking each side, and Butcher right in the middle. My setup was the same, with Wolves to my L and Skinwalkers to my R and the battle group in the middle with Ravagers out front.


On the opening turn he moved across the board and layered his front line in Shield Wall formation. With Shield March and Advanced Move from the tier, the IFP were nearly halfway across the board. They did not use the mini Feat, as really there was no reason to waste it when they could jam with with it next turn and I couldn’t reach a lot of Chuck’s stuff anyway. On my turn, I crashed with Ravagers cleared the front models, and filled in the gaps behind with my rear guard units. We had both successfully jammed the zone and I had taken first blood.


Chuck took the dice back, and the play was clear: Shield March, advance, and kill as much as possible then pop mini Feat, hoping to mitigate what I could do. Chuck was able to clear all but one of the Ravagers with his two units, thanks to some good CMA work, and got a Skinwalker and a couple of WoO. On my turn it was Feat time, as I only had a Ravager left, and didn’t want to risk losing all those bodies for good. I activated Morvahna, up kept Carnivore and Feated back everything I had lost. Healed myself a few and camped. Wolves then mini-feated, charged and cleared a good amount of IFP on the L. The Ravagers moved back to jam the Jacks and Butcher back, then the Skin Walkers went to Work on the R, killing a few more IFP, and a Kovnik. Despite their work, that flank was looking strong for Khador as I hadn’t killed as much as he did; good news was I controlling the other flank pretty well.


Khador turn, Chuck decided to push the Flank he was strong on. The remaining Kovnik activated to clear Butcher of a Ravager. Then Butcher activated popped Feat and rushed into a few more Ravagers and a Skinwalker. He easily dispatched the three models he was in melee with which allowed his IFP on the R side to really push forward and charge into more of the Ravagers, and clear a few more. Then his Jack ran forward to engage some of the remaining Skinwalkers so their next turn would be mitigated. On his weaker board side, Chuck’s other Jack moved forward to clear a couple of WoO, continuing to anchor that side preventing the zone from clearing. The last of the IFP pressed forward and took down another WoO.


On my turn, I surveyed the board, and saw that we were starting to run out of pieces, but I had to start to get rid of his heavies, and this would require using mine. Good news was one of his Jacks was nearly out of the game way on the L and at this point, not threatening to my battle group. I had my Warlock and two heavies to deal with Butcher and a Juggernaut. So I opted to port the Feral in, in hopes of one rounding the Khador heavy, which would force Butcher forward to deal with my heavy beast, hopefully leaving the warcaster exposed for retaliation my next turn. Let’s see if I can make it happen. Feral goes in and leaves the Juggy on life support. The Skinwalkers CMA to finish him off. On the L side the remaining Ravager and WoO clear off the IFP on that side and jam up the now lone Jack. I finish off my turn by moving the Guardian into the stones to be able to teleport to where the Feral was so Butcher could be dealt with, if he indeed comes in. I activated Morvahna, put Carnivore on the Guardian before ending my turn, setting up my counter plans for next turn.


Khador turn, and it quickly becomes apparent that Butcher is going to get his hands dirty. The Kovnik activates again, clearing the path for Butcher to the Feral. He is able to one shot the Skinwalker in the way, and clears a nice charge lane for Orsus to the Warpwolf. The charge attack missed, but don’t worry, he two shots the beast and camps the rest. Juggernaut does kills another WoO on the far side, and Chuck clocks back to me… and closes his turn proclaiming, “Let’s see if the bitch can kill me!”


Let’s see indeed!


The piece trade has happened as planned and now it’s go time, I up kept Carnivore, ported the Wold Guardian in, boosted the first attack roll and landed it, KD Butcher, boosted damage, then boosted my second damage roll and had him down to less than half life. Go, go Goat! She charges in, Life Trader and brings Butcher closer to the end, another attack, and I’m a few HP away; and her third attack with Life Trader and boost finishes the game, winning me a Hardcore Title!!!!


Overall what an amazing tournament! As I said at the onset, most difficult stretch of players I’ve ever had to overcome to win a single event. Kudos to all the guys I played, especially Chuck who proves every time I see him play why he’s the best in the game. Can’t ask for a better person to play a great game with, or have more fun playing against.


I have become extremely impressed with how truly versatile my list is; adaptable to a bunch of different styles, and it has performed so well across the board. After playing through this event this past weekend, I have to say it may be best suited for Hardcore. It gets across the board quickly, recursion in the opponents face, and makes it difficult to stop from eating pressure points. What’s more is Morvahna herself is difficult to assassinate with access to Flesh of Clay, Empathetic Link, Fog of War, Imperishable Conviction and the Fury mechanic which is another asset in the Hardcore format.


Couldn’t be prouder of my performance or how the list performed this weekend! An amazing event, with awesome opponents, resulting in one of the crowning achievements of my competitive career!


DOGC Announces Junior Dark Omen!!!!

As was discussed on Forgot To Feat: Episode XVII; we are very proud to announce a special project that we feel is going to be great for not only DOGC, but also for the community that supports us… Junior Dark Omen!!!

This gaming club has become so much more than we envisioned when we began; we not only improved our own ability to play the game, but also raised thousands of dollars for charity, created a podcast that has become a platform to introduce the great players/personalities from the northeast to the national community, and brought a Warmachine Weekend Invitational Qualifier back to our region. While we are so proud of these accomplishments, our true ultimate goal is having this gaming club be something that persists into the future. There is no better way to do that than to foster the game with the next generation of players

Junior Dark Omen is going to be for any young person in the community that has interest in joining. If you have a child, young sibling , know a young person, or you yourself fit the criteria, please reach out to us via our email: darkomenclub@gmail.com or at any of our social media feeds (on Twiiter, Facebook, or Google+). Here is what being a member of Junior Dark Omen entails:

  • At least 13 years of age to join
  • Dues: NONE – club will strongly support (and recommends) any parental requirement for the young player (eg. minimum grade level in school, chores at home, etc.)
  • attend one practice every other month on the last Saturday of the month starting July 2015
  • DOGC will bring our Jr. members to one event with us every 6 months and incur any associated costs of the vent and travel (notified in advance and with parental permission).

We are all very excited about seeing more young people start playing the game, joining the club, and helping build the future of the meta! Please do not hesitate to reach out to us if you want to be part of the next generation of DOGC!!!


Dark Omen Practice!

Something Dark Omen wants to do in 2014 is get out and meet more people and have some great conversations and really get to know New England.  While we get to hang out a little bit at tournaments with everyone, we wanted something a bit more intimate.  We came up with “Dark Omen Open Practice”!

What is Dark Omen Open Practice?  We will be traveling to stores all around New England to spend the day hanging out and playing games.  While our general practice structure is 50 points, 2 lists and on the clock, we will play anything!  Our goal is to show up at your store some time around when it opens, play games until about 6:00 and then head out for some dinner in the area.

Here is our schedule so far for the year, expect more dates to be added.

Gamer’s Gambit (CT) – March 8th

Temple Games (RI) – April 26th

Hobby Bunker (MA) – June 21st

The Only Game In Town ( NJ)  – August 23rd

We are looking forward to playing some games with everyone soon!

DOGC Opens 2014 with Hard Core Win!

This weekend in Nanuet, NY at Toy Whiz, Anthony Ferraiolo started the year off right for DOGC winning the SR 2014 Hardcore Event. Here is a review of the games played and how the day was won…

It was a great day for a tournament on a snowy Saturday in January! It was my first trip to Toy Whiz and the store is an awesome venue for an event of any size. I encourage everyone to take a trip to Nanuet, NY and check it out. Also want to give a quick shout to Jeff Frederickson, PG extraordinaire who ran the event and did a good job getting us out of there in a reasonable amount of time. Now onto the event at hand!

Whenever I head down for games in the NYC Metro, I know there will be a strong collection of players; this field was no different. Despite being only a dozen players, there was 3 or 4 multi time Masters qualifiers in the mix, so there would be no soft games. I attended with the intent of trying my eMorvahana build in the Hardcore format. I had not played Hardcore in 2013 at all and my last experience in 2012 was with Terminus who is an entirely different ball of wax than eMorvy.

I’m still running the same version of the eMorvahna list I’ve had since GenCon. I see no need to make changes at this point, but again I want to stretch it a bit and see what it can do in different formats. If you need another copy of my list you can find it HERE. The only thing the Morv build shared in common with Terminus list was the mass of infantry models on the table. However, the models in the Terminus build are required to do less work, and the real threat is imposing him upon the opposing force. With my eMovahna list, each model is doing more in each activation, and Morvahna is a true support piece. Her positioning is also much more tricky, especially in Hardcore where time is short. I don’t have the luxury of being able to make a mistake, especially when she is likely be taking damage. I will try to use my strength in numbers and speed to my advantage in hopes of taking control of the zone and scoring Pressure Points on the opposing Lock/Caster. Let’s see how this goes!

ROUND 1: vs Siege

RECAP: This round was vs someone I haven’t seen since before TempleCon last year, and a lot has happened in a year, for sure, but I was happy to be across the table from Dave Serrano. Playing Cygnar with Circle is never a great feeling, and playing Siege is even less fun. Circle is more susceptible to boostable guns than most others. Siege, presents a unique challenge as with the Feat he has an opportunity attrition my Feat out of the game by killing whole units while also posing a hugely credible threat to Morvahna herself. I didn’t like this opening match up at all, but hey, this is what we are here to see.

Dave wins the start roll chooses to go first. I survey the table, and there is a building on one side, and a wall in the zone more on one side of the table than the other, that is also supported by a forest deeper on that side of the table, and I decide that’s my ticket. I figure that if I need to I can take a Pressure Point and hide behind the forest, which Mage Site shouldn’t be able to get around; if all goes right I can push my position to the zone and camp the wall. Siege sets up with Stormwall in the middle of his zone, and puts the Avenger to the R (from my side of the table), then sets the gun mages to the far R with a Stormsmith and Arlen. On the L is Siege with two more Stormsmiths, Junior, Reinholdt, and a Squire. AD out front are the Rangers with Eyriss out the far R. On my side of the table I setup my line w/ Morvahna in the middle, the Wolves of Orboros to my L with Feral just next to Morvahna, the Woldguardian flanking Morvahna ot the R, and the Skinwalkers on the far R. The Ravagers AD out front center flanked by the two Gallows Groves, and stones mixed in the lines with the Ravagers.

On the Cygnar opening turn, the Rangers slunk forward, and Stormwall moved forward dropped a pod. The Gun Mages run into position, and Eyriss ran into position ready to do damage when needed starting next turn. Junior put Arcane Shield on Stormwall, and the Stormsmiths ran to each flank. On my turn, I didn’t waste much time, I knew I had to get up the board. So I pushed my line; the storm pod was close enough to charge with the lead Ravager, and the rest ran to engage what they could, I got a few Rangers stuck as well as an outlying Gun Mage. The pod was easily dispatched. Next I had the Wolves run at the building on the L, reason why I picked that side to deploy them was because they could successfully envelop it and the UA could hide behind it. The Skinwalkers moved freely in the woods on the R to the edge thanks to Pathfinder. I put Fog of War up and dropped and arc node in front of Eyriss. I didn’t have much time to eyeball the distance to see if I could get within Stealth  range and decided to try slinging a Sunder Spirit at her; taking her out first turn saves headaches later. Alas, my opponent positioned her astutely and Morvahna ate the Sunder Spirit and took some damage. Not a stellar way to end the opening turn but my lines were up the board. Finally I moved my beasts forward to flank Morvahna, leaving them far out of Stormwalls gun threat range. My opponent would have 7 quick minutes to respond.

On the next turn Siege had the turn to do something, and he started in on the Ravagers. Between the Rangers, Stormwall, and the some Gun Mages, he was able to take out about half of the Ravagers, and some WoO. The damage was not significant at this stage, and with a rather indecisive turn (thanks to a lot of Reach and good board position), I decided to jam his lines aggressively knowing I had to stop the Feat,  that was inevitably coming next turn, from blowing me off the table. The remaining Ravagers ripped through the Rangers thanks to corpse tokens and re-rolls. Morvahna activated and put Carnivore on the Skinwalkers before retreating to the woods near the back of my table side. Skinwalkers activated and charged into Eyriss and the Gun Mages they could reach. The ATGM made the Terror check but failed Command check for the damage they took from losses sustained from all the charges. Eyriss was eaten by two Skinwalkers. The WoO finished the job of clearing the zone on turn 2, putting the first Pressure Point on Siege, doing 5 damage to him. I finished the turn by having the Wold Guardian put Flesh of Clay on himself and the Feral ran to the wall to take a good position. The Stones flanked the heavies ready to port into Stormwall whom I suspected was coming forward next turn.  I was much happier with this turn and turned the dice over to Dave.

Top of 3, I knew Siege was going to Feat this turn and I suspected it would be in an effort to take out the Feral. I was right about the Feat as the Warcaster activated first and used his Ground Pounder attack to clear out the area in front of Stormwall. He had to make room for the Colossal to contest the zone, which also met he wasn’t going to be able to gain the aiming bonus. As such, not willing to risk two missed Defender cannons on 12’s, he opted to have Stormwall kill what he could within melee reach and drop covering fire to cause problems for my units next turn. The Feat had made quick work of the Ravagers, although I was able to keep 1 alive back by the wall next to the Feral. The WoO had taken losses as well thanks to the Storm Smiths and Junior. All said and done, the only thing in the zone was the Stormwall, but he was completely untouched and I was nearly out of Ravagers, but had a Feral and a number of other attacks to put into him. That was the plan this turn, start with the Feral and do as much as I could, then get the WoO in on him with a mini feat, I also knew I could get two maybe three Skinwalkers there on a charge and my last Ravager, then Feat with Morvahana and hopefully jam out of the zone; hopefully not to run out of time! The plan went off very well, the Feral did a ton to the Stormwall who did not have Arcane Shield anymore as it was moved to Siege after he came forward aggressively last turn. The Skinwalkers activated next and they finished off the Colossal with two that reached him, and the others cleared the remainder of the ATGM and Stormsmith. Sweeping the R flank successfully. the WoO activated and charged to clear off the rest of the support in the rear leaving just Siege, Arlen, and a Stormsmith with the Avenger. I then moved Morvahna forward, Feated back all the Ravagers and most of the WoO that had been lost jamming his remaining models as best as could be managed, then Light Calv moved to the wall. I would dominated for another Pressure Point and 7 more damage to Siege.

Turning the dice over to my opponent. Dave surveyed the board, and he indicated there was little hope of what he could do. Siege couldn’t contest the zone, the remaining Stormsmith couldn’t navigate the wall of reach weapons to get to the zone and the Avenger with a Colossal wreck marker in the way and being attached to the ATGM could not move far enough to get to the zone. All that being true, I would dominate the zone again that turn ending the game via Pressure Points assassination.

Opening Round Final Shot

ROUND 2: vs eButcher3

RECAP: Another player I hadn’t played since before TempleCon last year, Will; who is now running Butcher3… shaking my head just thinking about it. Only 2 players there with Butcher 3 on the docket, and I get one of them in Round 2. Will was coming off a strong showing in round 1 where he top of two assassinated one of the masters players (Charlie Moss) playing his list from TempleCon Hard Core where he finished top 5. Given that result I new Will was well versed in what he was doing with the list. Fortunately, this is a list I want to see more because I need to get comfortable in this matchup as I will see Butcher3 for sure. Looking at the matchup and the board, I decided I wanted to go first. Last time I faced this list in the Invitational I had to go second and realized that taking board position against this list is very important especially with the pressure Butcher can put on you starting turn 2. So I opted for first; my opponent astutely took the side with the wall to deny me the natural protection it offered.

On deployment I decided to go with my WoO on my left as there was a building on the right and it was close enough to the zone that I would have to entirely sweep around it with the larger unit, unlike the last table; so I wanted my smaller more maneuverable unit to navigate that, which means the Skinwalkers to the R. Beast load out in the middle, and Ravagers would AD out front center. Will decided to deploy his Widowmakers and Eyriss directly across from the WoO which was the most sensible place, then took his two units of Black Fang IFP and double stacked them across from the zone with his Juggernaut and Butcher to the center L (as I looked at the board), and Fenris was on the far L flank by himself to avoid the unnecessary abomination checks on his friendly models. Madelyn and Saxon were near Butcher to support the army as needed.

On the opening turn, I took strong position with the Ravagers in the zone to threaten anything that came into the zone, and new I would be getting the alpha, everything else ran forward to support and make a nice battle line about the 20” line or so up the table. I moved Morvahna to my R where I had a hill to toe, and decided to put Carnivore on the Skinwalkers this turn as that is where they where it would be needed most next turn, given the amount of troops on that side. Comfortable with my position I turned the dice over to Will. The lead IFP unit ran into the zone and right into engagement with my Ravagers to set the line of engagement as far up the table as they could, but it cost him Shield Wall on the opening turn. The Widowmakers took position on the L side with Eyriss and fired from the woods to put work into the WoO.

On my next turn, I knew it was going to have to be decisive and with only 7 minutes, I had to go immediately. I could to clear the Ravagers with the Skinwalkers so they could spring into the second line of troops. I upkept with Carnivore on the Skinwalkers and moved into the spaces behind and around the Ravagers with Carnivore to clear most of the IFP that were in the way. I then activated Morvahna and cycled Carnivore onto the WoO, slung a well positioned Death Knell onto a few IFP before moving her into safe position at the edge of the kill box diametrically opposed to Butcher. The WoO activated and charged the Widow Makers, Fenris, and the lone IFP still in the way. Cleared all I encountered thanks to Powerful Charge + Carnviore + CMA. Fenris was dehorsed, and the Ravagers were now primed to charge into the second wave of IFP. I had to move quickly so I did what I could to get through their activations. I was still tied in a bit, but managed to clear the zone of IFP, however, I could not score as I was going 1st. However, I felt good about the position I was in, with ⅔ of the IFP gone. I moved my two beasts into more threatening positions and dropped stones in front of them and Morvahna and my two heavies. Will took the dice and was pretty far down on model count and I still had my Feat, so I was in commanding position. He used the IFP remaining to Mini Feat and move into the zone, and cleared about half the Ravagers. The Juggernaut now moved into the zone to clear a few more models. The Widow Makers were all tied up, but Fenris managed to kill a few models. The Kovnik was able to get a Skinwalker, triggering Relentless Advance and he had managed to stop me from scoring a Pressure Point but this turn it was likely going to get bad next turn.

On my turn, there were a half dozen IFP in the zone w/ a Kovnik, and the Juggernaut. I up kept Carnivore on the WoO, and mini feated to charge them in to clear some IFP, put damage on the Juggernaut, and remove unmounted Fenris. I then activated Morvahna and cycled Carnivore onto the Skinwalkers. I charged them in behind the Ravagers again to poke holes in B2B lines of the IFP under Iron Zeal and Shield Wall, enough to leave them vulnerable to the remaining Skinwalkers. I had a couple of Ravagers charge the Juggernaut and do some additional damage to him. Then the Wold Guardian was dropped in and able to finish the Juggernaut off clearing the zone. I took a Gallows Grove and dropped it in front of the Wold to stop Butcher from pulling him from a safe position; he would have to come forward to deal with him. With that, the zone was clear, and a Pressure Point on Butcher for 5 damage. Will took the dice and knew Butcher would have to get his hands dirty this turn, and it started with him moving forward to clear the models between him and the Wold, with the Argii attacking the Ravagers they were engaged with. Butcher cleared the models in the way, then used impending doom to pull the Wold in. He did enough damage to take out the remaining models around the Wold and took out his Spirit. The feated, back to full Focus, and with the clock running low, decided to stop there, believing he would only make himself more vulnerable next turn with the a lot still in range of him. Before I took the dice, we tabulated that Butcher would take another Pressure Point because he was not contesting the zone; that’s a total of 1o damage on Butcher.

As my turn started, I still had my Feat, but wouldn’t need it, because I only need to cause three damage to Butcher and dominate the zone by moving Morvahna in to cause another 7 points of damage from the final Pressure Point to end the game. I activated Morvahna first, moved Carnivore to the Feral and used my remaining Fury to sling a boosted Sunder Spirit into Butcher doing some additional damage. I activated the Wold Guardian relying on two chances at a re-rollable 8 to KD Butcher, and I had Feral with Carnivore as a fail safe. The first swing from the Wold was successful and Butcher was on the ground. No damage, but he was prone. Feral was teleported in on the first swing he did the requisite three damage to ensure that that he was done at the turns end. The remaining attacks from the Feral and finished Butcher without needing the final Pressure Point. This was a solid victory against a tough list and opponent. Was happy to be moving onto the next round.

semi final final table shot

ROUND 3: vs eButcher3 (again)

RECAP: After the end of my last round I learned the pair down from the previous round had lost, meaning I would be playing on top table in the next round. This round would be against Jeff, a player whom I’ve not faced since he was playing Skorne a year earlier at the Dragon’s Den. Now he has moved onto Butcher 3, and I would have to overcome him again if I was going to win. The difference in this match was the list had two Devestators, making my ability to gain pressure points that much harder. I again won the roll for first turn, and took it, and my opponent again put me on the side of the table (we were on the same table I had just played on). My deployment had worked out well last time, so I opted to do the same thing this time. Jeff only had only one unit of IFP (which he stated later was to save time and prevent scenario Pressure Points) and put it in the same place as my previous opponent, and everything else was mostly the same.

On my first turn, opened up just as last time, with my Ravagers going strong to the center of the board, the WoO and the Skinwalkers moving way up the board, with Carnivore on the Skinwalkers and Fog of War up. My opponent had a different opening turn in this game, however, using the Kovnik to Shield March the IFP who Shield Walled, and used their Mini Feat, allowing them to touch the outside of the zone. The Widowmakers took the same position at the edge of the woods with Eyriss and opened fire on the WoO. Fenris ran around the flank full bore to try and force an Abomination check but was unable to get there.

My second turn I would have to charge the Ravagers across the zone, luckily the POW 15 from Brutal Charge would help break up the IFP under Iron Zeal. I did just that, and was able to get about 5 IFP off the board. Then I dropped the right Gallows Grove up the table and was able to get it in the back arc of the Kovnik, despite him having cover from the building. I was able to get him off the table with a Sunder Spirit from Morvahna. Then used the Mini Feat from WoO to dehorse Fenris on the L, and piled the Skinwalkers and remaining WoO into the zone behind the Ravagers. The Beasts moved into the zone and the stones dropped in front of them to protect from Impending Doom and be sure they could threaten the whole zone. Butcher took the dice and moved the remaining IFP into action by starting to clear the front line of the unit, and get into the zone. The Jacks moved forward as much as they could but did not want to open. Widowmakers were able to get another round of shooting due to how effective they were last round I wasn’t able to get them engaged. Eyriss then moved forward again and the WoO were down to less than half, and the Ravagers were down a few models. Saxon also was on fire this game plucking his second model in as many turns. The dogs were able to help at this point and so was Butcher. Ravagers were down below half as were the WoO. Zone was contested, and the two jacks were going to be able to get in next turn.

On my turn, I decided I would Feat back what I lost and score a Pressure Point this turn to get damage on Butcher and perhaps make it difficult for the ‘jacks to get in the zone. I activated the remaining Ravagers first and got a few IFP, then activated the WoO who were finally able to engage Eyriss and the Widow makers as well as Saxon. I up kept Carnivore on the IFP and then Feated 10 of the models I lost back onto the table. Then had Morvahna use a Gallows Grove to get a well placed Death Knell on the IFP Flag, Corbeau, Ayianna and an Argus. I was able to kill all but the Argus. I then retreated to the rear of the zone, and let the Skinwalkers kill the remaining IFP to heal Morvahna about half of the damage she had taken. The Stones moved farther forward, and the beats were now pressed further forward in the zone. I had successfully cleared the zone, and dominated putting 7 damage on Butcher. Jeff knew that the game was tilting in the wrong direction and had to get into the zone, and be aggressive with Butcher. He started with the first Devstator, moved forward and popped open, clearing most of the models around. This allowed the second Devestator to move into the zone, pop, and clear more infantry, he hot rolled a lot of damage on the 8 box models. The space available now cleared room for Butcher to get into the zone and start to really cleanup. He cleared the models around him, impending doom feated, and cleared some more, and ended the turn with 4 focus on him.

Butcher was in the zone, close to Morvahna, who had now been healed back to to full thanks to Imperishable Conviction. The two jacks had opened up, which allowed me the opportunity to possibly take them out. However, Butcher was in the zone only on ARM 22 and down ⅓ of his HP. So I decided to go for him. I did not upkeep Carnivore. I activated Morvahna first, put Carnivore on the Wold Guardian, and threw a Sunder Spirit into Butcher, with a re-roll had Butcher down to half life. I activated the Stones and dropped the Wold Guardian behind the Butcher, and activated the Wold, who went to town able to KD the Warcaster on the first swing. Then using Ram started pushing Butcher toward the Feral so I could walk into Melee with the second heavy. However, on the final swing with the Wold, Butcher was finished. Tourney over!

Final Table Shot

This event was a great exercise for me. I was fortunate to win, given the matches I had. As I said at the onset I wanted to see how the Morvahna list worked in the format and I think it has real potential. The jam tactic does have a lot of viability because it puts direct damage onto the opposing ‘Lock or ‘Caster if I can use it to score Pressure Points. Additionally once damaged, her assassination becomes that much more live. Also, when the opposing Caster/Lock is bleeding my infantry becomes that much more likely to finish the job with charges and re-rolls. The trouble is having to activate everything and move quickly. Unlike the Cryx lists I have run in the past, I cannot rely on my Feat to keep me in the game alone, and to support my tactic of trying to take over the zone, I have to get the most out of my activations, which creates the leverage in the attrition. Additionally I saw that I don’t need to Feat to win with the list in this format. While I obviously would prefer to do but, with time constraints that I have it doesn’t need to happen. Seeing that go successfully in round 2 gives me confidence that it’s a viable thought going forward (when applicable and I need to save time). I believe it’s a list that can be played in the Hard Core format, as long as I get through my progressions efficiently, and don’t waste unnecessary time.

Another take away from the event now getting a better look at Butcher3, I realized the value of having the immobile models; being able to prevent the Impending Doom from pulling everything in is huge. That means placement on Stones and Gallows Groves can save your battlegroup from certain death. That doesn’t mean they can tank the opposing army, just means you can use them to buy time, or even catch an unsuspecting Butcher 3 player from failing to realize the interaction. Killing the Kovniks slows the army down, but unless you can get them early, it doesn’t make enough of a difference to waste a high priority magic missile on them.

The last point of note was that the Butcher3 lists were nearly identical to what I saw at the Invitational, with some combination of IFP, Widowmakers, Eyriss, Corbeau, and Kovniks. The additional points expenditure on Fenris or A&H, or whatever are subtle details, to what the list wants to do. You have to manage his threat range and make him burn focus to clear the jam between your caster and him. The heavy jack in his list is only a trade piece, and while it’s a problem, it’s important not to take the bait and give a heavy to make it happen, only to have Butcher mop it up in retaliation. Recognize that and not wasting the effort to kill the heavy, when those pieces are really need to kill Butcher.

I’m overall happy with the table time from the event, and got some pretty sweet games in, bonus was being able to take home the W! Toy Whiz is a great venue and thanks to Jeff Frederickson for running the tourney.